Rotating Fixed Paddocks
Draw once, then tap to rotate
For permanent paddocks you reuse — numbered cells, fenced lots. Draw each one once; from then on a rotation is two taps, and the map shows which paddock is readiest.
Setup first: animals in Animal Groups, pasture mapped (see Set up your pasture). Open Paddocks → toggle 📍 Fixed Paddocks → pick your pasture tab.
Draw a paddock (once per paddock)
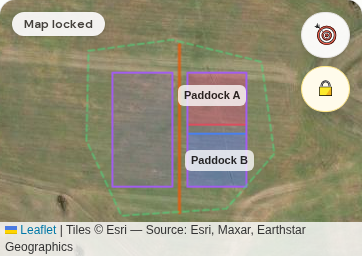
- 1Tap ✏️ Draw a paddock — tap corners on the map.
- 2Tap at least 3 corners on the satellite; name it ("Paddock A"). 📍 Add corner via GPS works too if you're standing on the line.
- 3Tap Save paddock. Repeat for each paddock.
Moving animals in — and between paddocks
- 1Tap the paddock on the map → its action sheet opens → Move animals in… (or use the Move in button on its list row — freshly drawn paddocks sit under Show inactive until first use).
- 2Tap your animal group, check the date. ▾ More options holds the grazing-chart extras (stock density, pre/post-graze condition…) — fill what you track, skip the rest.
- 3Tap Record move →.

Once placed, the big status button counts down from your planned days — "Move in 2 days" → Move today → → Move now → if you run over. Tap it any time to move; tap a specific paddock to choose the destination yourself. Transfer out sends the animals to a different pasture entirely.


⚠️ Running polywire strips inside a big paddock? Place animals here starts the 4-step hotwire capture: two GPS points on the back wire, two on the front, and each following move reuses the old front wire as the new back — two points per day.